1.创建一台云服务器
注:硬盘选大点,机器学习数据大的很,建议50G起步,视频里使用的是Vultr云服务器。
不清楚如何创建云服务器的看我这个视频的后半段
服务器准备工作:
以debian/ubuntu举例
#更新系统
sudo apt update && sudo apt upgrade -y

#安装gcc等编译器用于开发环境
sudo apt install build-essential

#安装python 版本按需调整
sudo apt install python3.9
2.安装miniconda
复制安装链接
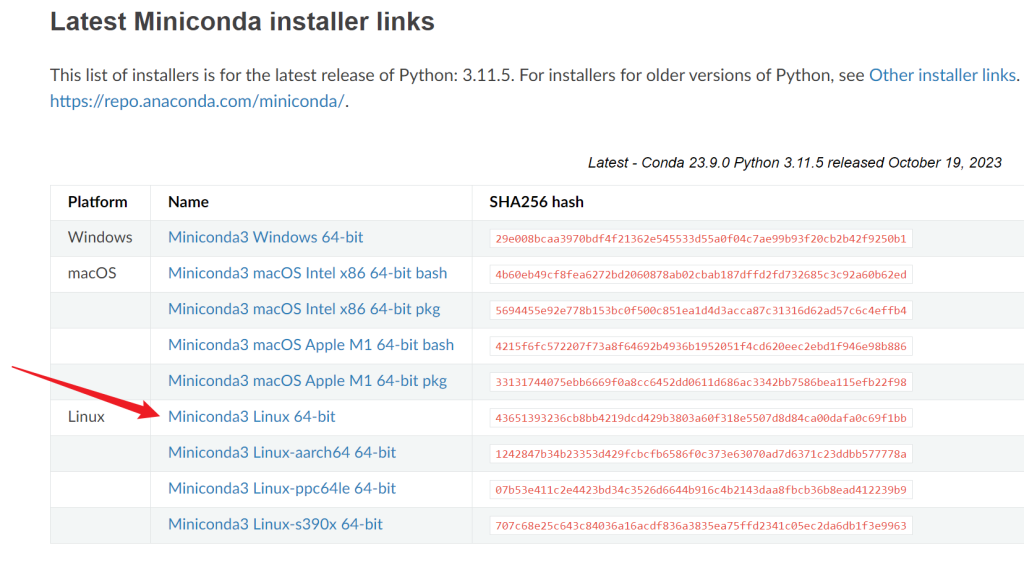
到服务器上wget 链接

然后bash 运行下载下来的脚本安装文件

初始化后,再输入bash就进入miniconda的base环境了
3.配置miniconda环境
# 创建一个名字叫newname的新环境,指定python版本,安装pip包管理工具
conda create -n newname -y python=3.10 pip

# 激活环境
conda activate newname
新环境里安装你需要的包
这一步,国内的服务器请换源,不然速度太慢,换源可以看我这个教程:
pip install jupyter torch torchvision
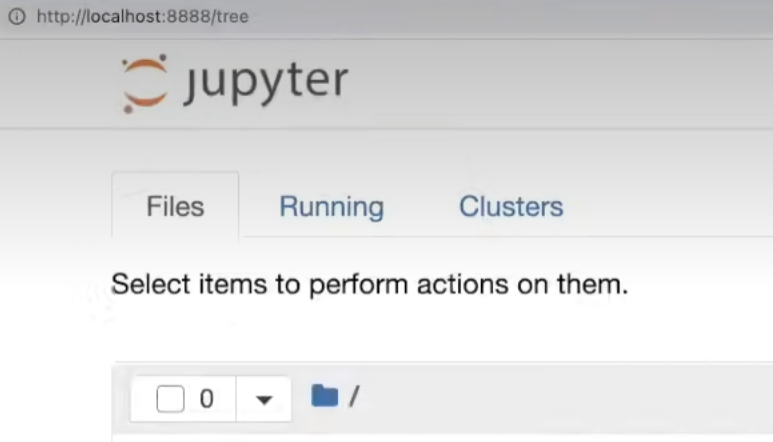
4.本地连接服务器的jupyter notebook
本地终端用ssh,把服务器8888端口映射到本机8888端口:
ssh -L8888:localhost:8888 root@ip
运行jupyter notebook(如何后台运行在‘进阶’部分):
jupyter notebook
得到一个链接,复制到本地电脑,打开即可开始使用

大功告成
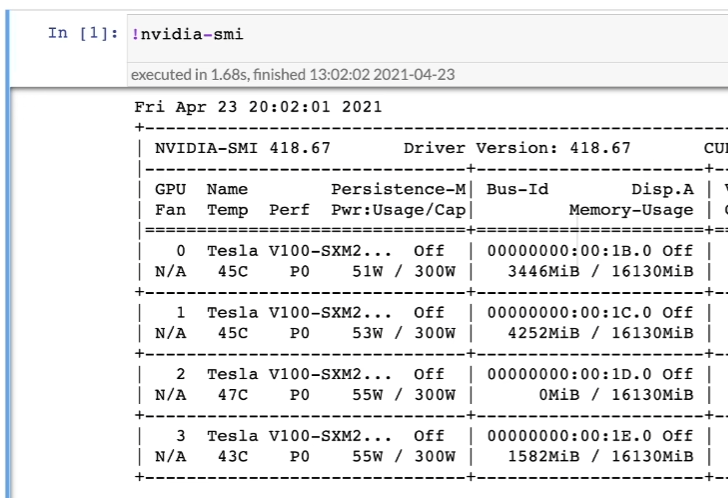
放到Jupyter Notebook文件里检查服务器有没有GPU:
import torch

if torch.cuda.is_available():
    # 获取 GPU 数量
    num_gpus = torch.cuda.device_count()
    print(f"Number of available GPUs: {num_gpus}")
else:
    print("CUDA is not available. No GPUs detected.")
检查服务器有什么GPU:
!nvidia-smi
进阶
1. 后台运行
如果你需要让jupyter notebook在后台稳定运行,不会随着ssh连接中断而停止,用下面命令启动:
nohup jupyter notebook --allow-root > jupyter.log 2>&1 &
(后台启动完查询登录地址:jupyter server list)
2. 终止进程
- 用
ps -a, 可以显示这个进程的pid. kill -9 pid终止进程